Writing tests sounds boring until your app breaks and you have no idea why. In this post, we’ll walk through how to write simple, focused unit tests for a SwiftUI app using Apple’s built-in framework: XCTest.
We’ll use a small SwiftUI demo app as a sandbox. You’ll learn how to:
- What XCTest is and how it works
- How to write and run tests in Xcode
- Test basic logic in a ViewModel
- Avoid common testing mistakes
- Understand what parts of your app are worth testing
This guide is aimed at intermediate iOS developers—those who know Swift, have written apps, maybe even shipped a few—but haven’t yet made testing a regular habit. You’ll learn how to test logic without wasting time or overengineering your codebase.
What Is XCTest and How Does It Work?
XCTest is the default testing framework in Xcode. It runs your tests automatically and shows you exactly what passes, fails, or breaks. It supports:
- Unit tests – testing logic like ViewModels, data formatting, math, etc.
- UI tests – simulating taps, swipes, etc.
- Performance tests – measuring runtime of specific code
For now, we’re focusing on unit testing.
Note that WWDC24 introduced a newer framework Swift Testing that can replace XCTest for unit testing.
How to Add Unit Tests to Your Xcode Project
Step 1: Create a Test Target
If your project doesn’t already have one:
- In Xcode, go to File > New > Target
- Choose XCTest for Unit and UI Test
- Call it
ItemAppTests

Step 2: Add Your First Test Case
By default, your app code is not visible in your test target unless you mark it as public. But constantly marking internal stuff as public just for testing is dumb.
Instead, use this in your test files:
@testable import YourAppThis allows your test code to access internal stuff—functions, classes, etc.—without changing your access levels just for testing.
You write unit tests by subclassing XCTestCase. This is a simple test function:
import XCTest
@testable import ItemApp

final class ItemAppTests: XCTestCase {
    func test_example() {
        XCTAssertTrue(true)
    }
}
Let’s break it down:
- import XCTest gives you the test tools.
- @testable import ItemApp makes your app’s internal classes accessible to your test target.
- The class must inherit from XCTestCase.
- Every test method starts with test – otherwise it won’t run.
- XCTAssertTrue(true) is just a placeholder—it’s a way to make the test pass.
▶️ How to Run Your Tests
You can run your tests from anywhere in Xcode. There are three ways:
The diamond icon ▶️
Look to the left of any test method or class in the gutter.
Click it to run that specific test.Keyboard shortcut:
⌘ + U
This runs all tests in your project.Product > Test from the top menu.

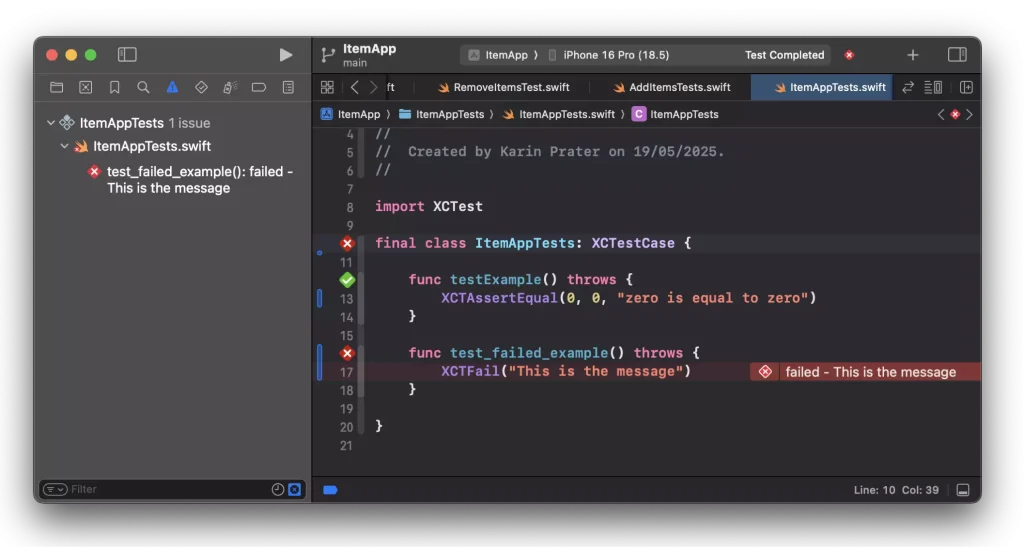
If a test fails, Xcode will highlight the failed line and show you the actual vs expected values in the Test navigator on the left sidebar.
What Is XCTAssert?
XCTest provides a bunch of XCTAssert* functions to check if your code does what you expect.
Here are the most useful ones:
| Function | Use Case |
|---|---|
XCTAssertTrue | Something should be true |
XCTAssertFalse | Something should be false |
XCTAssertEqual | Two values should be equal |
XCTAssertNotEqual | Two values should not be equal |
XCTAssertNil | Value should be nil |
XCTAssertNotNil | Value should not be nil |
Example:
let count = 3
XCTAssertEqual(count, 3)
XCTAssertTrue(count > 0)
XCTAssertNotNil(viewModel.items.last)
If any of these assertions fail, the test fails, and you get clear feedback inside Xcode.
To help you understand what is going on when soemthing breaks later, you can add failure messages:
XCTAssertEqual(count, 3, "Expect that the item count is 3")
XCTAssertTrue(count > 0, "We should have at least have 1 item")
Testing a SwiftUI app with MVVM design pattern
We have a small SwiftUI app where users can:
- Add new
Items by name. - Remove the last item in the list.
- See all items displayed in a scroll view.

All state is handled by an ItemViewModel, which looks like this:
final class ItemViewModel: ObservableObject {

    @Published var items: [Item] = Item.examples
    @Published var deleteDisabled = false

    func deleteLastItem() {
        guard items.isEmpty == false else { return }
        items.removeLast()
        deleteDisabled = items.isEmpty
    }

    func addItem(name: String) {
        items.append(Item(name: name))
        deleteDisabled = items.isEmpty
    }
}
It also exposes a flag deleteDisabled which reflects whether deletion should be possible.
These methods contain simple logic, but that logic can break silently when refactoring or adding new features. That’s why we write unit tests—to lock down behavior and catch breakages immediately.
This is a good starting point because:
- It has simple logic we can test.
- It changes state in ways we can verify.
- It doesn’t depend on UI or system APIs.
Test 1: Adding an Item Should Increase the Count
We want to test that calling addItem(name:) correctly updates the items array.
We’re going to follow a clean test structure following “Given-When-Then”:
func test_add_new_item() {
    // --- GIVEN ---
    //  the initial state

    // --- WHEN ---
    // the action being tested

    // --- THEN ---
    // the expected result
}
What are we testing?
- That the item count increases by 1
- That the last item in the list matches the name we added
func test_add_new_item() {
    // --- GIVEN ---
    let vm = ItemViewModel()
    let initialCount = vm.items.count
    let expectedName = "Test Item"

    // --- WHEN ---
    vm.addItem(name: expectedName)

    // --- THEN ---
    XCTAssertEqual(vm.items.count, initialCount + 1,
                   "Item cound should be increased by onw")
    XCTAssertEqual(vm.items.last?.name, expectedName,
                   "Expected that the last items title is the new items title")
}
This catches mistakes like forgetting to append the item or accidentally overwriting the array. It’s your first line of defense when logic changes.
Making Tests more Resilient for Future Refactoring
When writing tests, you should try to write them in a flexibile way so that they will pass in the future. To explain this look at this test implementation:
func test_add_new_item() {
    // --- GIVEN ---
    let vm = ItemViewModel()

    // --- WHEN ---
    vm.addItem(name: "Test Item")

    // --- THEN ---
    XCTAssertEqual(vm.items.count, 4,
                   "Item cound should be increased by one")
    XCTAssertEqual(vm.items.last?.name, "Test Item",
                   "Expected that the last items title is the new items title")
}
I set the new item count to 4. Which works as long as i start with exactly 3 items. But what happens when in the future I change the starting point and have a larger intitial items array? – You guessed it. The hardcode value of 4 will fail the test. This would be a false alarm, if the actuall behavior is still correct. In order to avoid false alarms, try to avoid hard coded assertions like we did in the above example and use more flexible assertions like:
    let vm = ItemViewModel()
    let expectedCount = vm.iems.count - 1
Test 2: Deleting the Last Item Should Remove It
We want to ensure that deleteLastItem() removes exactly one item and that the correct one is removed.
What are we testing?
- That the count is reduced by 1
- That the item previously at the end is no longer in the list
func test_delete_last_item() {
    // --- GIVEN ---
    let vm = ItemViewModel()
    let initialItems = vm.items
    let lastItem = initialItems.last
    let expectedCount = initialItems.count - 1

    // --- WHEN ---
    vm.deleteLastItem()

    // --- THEN ---
    XCTAssertEqual(vm.items.count, expectedCount,
                  "Expected that the item count is lowered by one")
    XCTAssertFalse(vm.items.contains(where: { $0.id == lastItem?.id }),
                  "Should have deleted last item")
}
If you change how deletion is implemented—say, filtering instead of removing the last—you might introduce subtle bugs. This test guards against that.
Test 3: Deleting All Items Should Disable the Delete Button
This one checks the deleteDisabled flag. When the list becomes empty, the delete button in the UI should be disabled. This flag is driven by internal logic, not UI state.
What are we testing?
- That
deleteDisabledbecomestruewhen the list is empty
func test_when_all_items_deleted_then_delete_is_disabled() {
    // --- GIVEN ---
    let vm = ItemViewModel()

    // --- WHEN ---
    while !vm.items.isEmpty {
        vm.deleteLastItem()
    }

    // --- THEN ---
    XCTAssertTrue(vm.deleteDisabled, "Delete should be disabled for empty items array")
}
This test is protecting user experience. If deleteDisabled isn’t set correctly, the delete button could remain active and trigger unexpected behavior in the UI.
Test 4: Adding an Empty Name Is Allowed (for Now)
This test checks a behavioral detail: should the ViewModel accept empty strings as item names? Currently, yes. We want to write a test that defines and locks in this behavior.
What are we testing?
- That items with empty names are accepted and added to the list
func test_add_empty_name_item_is_allowed() {
    // --- GIVEN ---
    let vm = ItemViewModel()

    // --- WHEN ---
    vm.addItem(name: "")

    // --- THEN ---
    XCTAssertEqual(vm.items.last?.name, "",
                   "Should be allowed to add an item with emppty name field")
}
Even if this seems trivial, it locks in expected behavior. Later, if you add input validation, this test will fail—and that’s exactly what you want: clear visibility into changed assumptions.
That’s a solid principle—and yes, Vladimir Khorikov’s approach (from his Unit Testing book) is pragmatic and aligns well with long-term maintainability: don’t test everything—test what matters.
Let’s revise and expand the “What to test” section using that mindset:
What to Test: Focus on Logic That Matters
You don’t need to test everything. You need to test what can hurt you.
A good rule of thumb (inspired by Vladimir Khorikov’s Unit Testing book):
✅ Test code that is high in complexity and/or high in business value.
❌ Skip code that is simple and stable or low-value.
High Business Value
This is logic that the user or product owner deeply cares about. If it breaks, the app loses trust.
Examples in your app:
- Adding and removing items from the list
- Disabling the delete button at the right time
- Any decision that changes user-visible state
These are worth testing even if they look simple—because the behavior is valuable.
High Complexity
This is code that is tricky to get right or easy to misunderstand. Even if it’s not mission-critical, complexity makes it fragile.
Examples to test:
- Conditions like
guard items.isEmpty == false else { return } - Derived state like
deleteDisabled = items.isEmpty - Loops, multiple branches, or custom algorithms
❌ Don’t Waste Time On…
- Getters/setters or trivial code
- Things you don’t control (like Swift’s standard library)
In short: test where bugs hide and where logic changes break behavior.
You’ll write fewer tests—but they’ll do more work.
The Real Problems You’ll Face in Bigger Apps
Let’s be honest: the app we tested here is very simple. – In real apps, testing gets a lot harder. And that’s probably why many teams skip it or give up after writing a few tests.
Why?
Because real code touches more than just arrays in memory. It saves to disk, talks to APIs, handles background tasks, shows alerts, and reacts to user actions. That’s where the pain starts.
Here are the real-world problems you’ll hit:
Shared State Between Tests
What it is:
When one test changes something that affects another test. For example, if your ViewModel saved items to disk and you didn’t clean up after the test, the next test would see that data—even though it shouldn’t.
Why it’s a problem:
Tests should run in any order and still pass. If they don’t, they’re called flaky tests—they pass sometimes, fail other times. You can’t trust them.
Tests Are Too Fake
What it is:
Many tutorials suggest replacing real things (like network calls) with fake ones. This is called mocking. But if your fake doesn’t behave like the real thing, you’re not testing your real app—you’re testing a lie.
Example:
You mock a network call to return a clean JSON, but the real API sometimes fails, or sends unexpected data. Your tests still pass, but your app crashes. That’s worse than no test.
📱 UI Logic Isn’t Tested
What it is:
Most bugs happen in the UI layer—wrong button state, missing sheet, alert doesn’t show, tap does nothing. But many iOS devs avoid testing views because it’s “hard” or “not pure enough.”
Reality:
Skipping UI logic tests means skipping the bugs your users actually see.
You Can Still Use Real Code in Tests
You don’t need to mock everything. Sometimes using the real system is the better choice—especially for things you control.
For example:
Saving items to disk?
Use FileManager.temporaryDirectory in your tests.
That way you catch real issues (permissions, file not found, codable, etc.)
And you don’t affect other tests—as long as you clean up.
📚 What You Can Learn Next
Once you’re past basic unit tests, here are good next steps—each could be its own follow-up post:
Testing file saving using temporary files
– Real file system, isolated and safeUsing Core Data in tests with an in-memory store
– No need to mock your model layerTesting async code (networking, debouncing)
– UseXCTestExpectationorasync/awaitTesting SwiftUI view logic
– Don’t test layout, but do test state and actionsWhat shared state is and how to avoid flaky tests
– Deep dive into test isolation
Testing is easy when everything lives in memory.
It gets valuable—and tricky—when real-world stuff comes in.
Summary
In this post, you learned how to:
- Use XCTest to write unit tests for a SwiftUI ViewModel
- Structure your tests using the GIVEN / WHEN / THEN format
- Focus on business logic and state changes, not just code coverage
- Handle edge cases and verify behavior that matters to users
- Understand the basics of what to test, what not to test, and why testing gets harder in real apps
Don’t aim for perfect tests. – Aim for useful tests that protect you from regressions and crashes.
Most bugs live in the UI. Now that your ViewModel is covered, it’s time to test what users actually see and tap.
👉 Up next: XCUITest: How to Write UI Tests for SwiftUI Apps